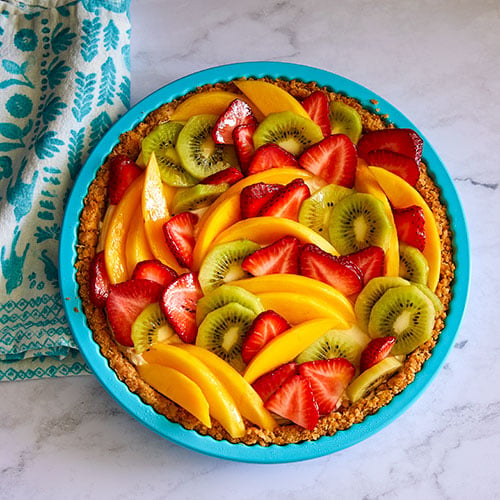
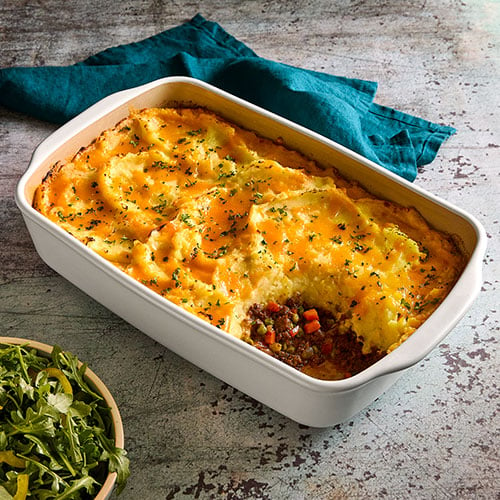
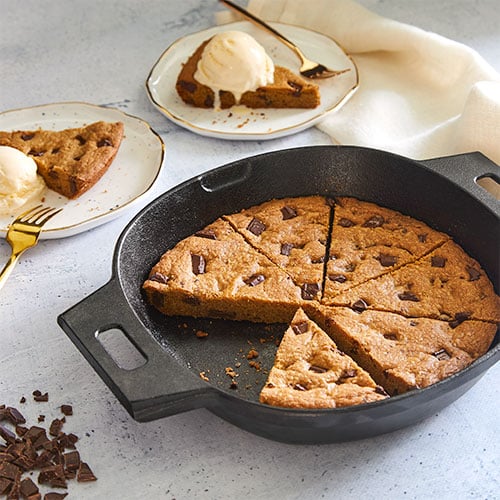
Deluxe Stand Mixer
Magic in the Mixing
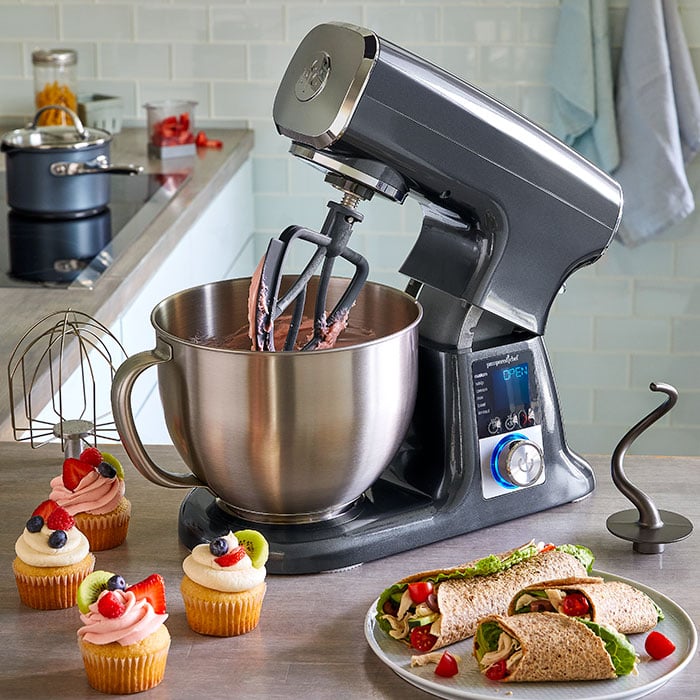
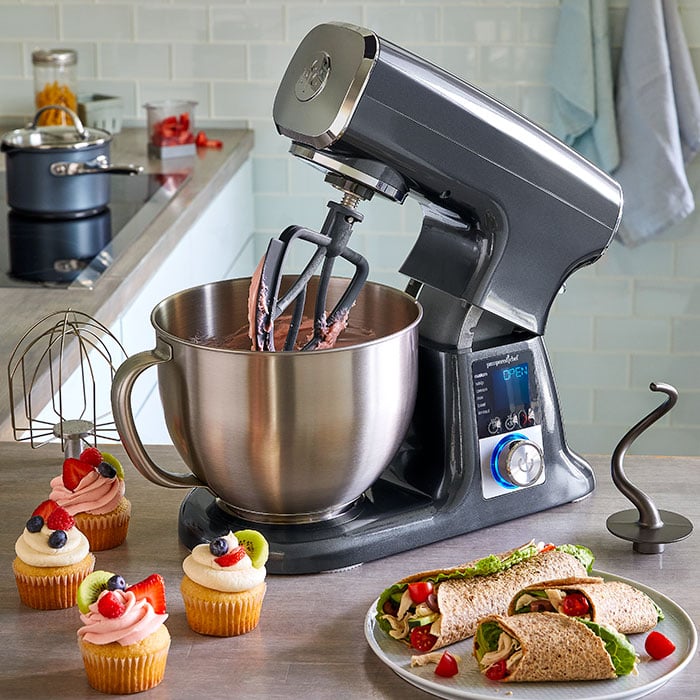
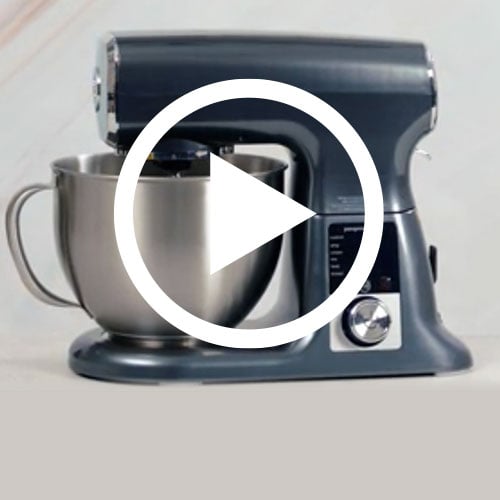
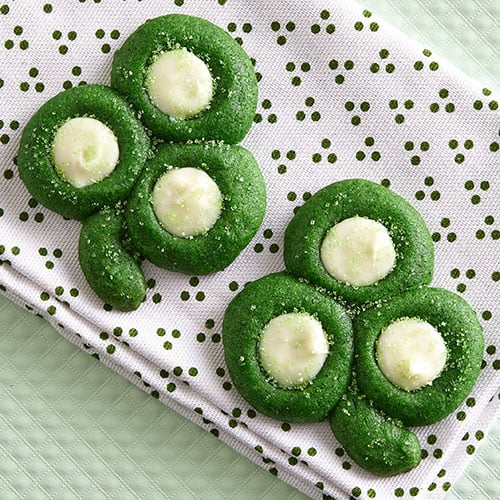
Whether you’re baking a batch of cookies or making a meal for your entire family, the Deluxe Stand Mixer is there for you. It has no-guess presets that automatically reach the ideal time and speed, so you’ll never under- or over-mix your batter again! You can use the Custom setting to set a specific time and choose from 8 manual speeds to prepare recipes you already know and love.
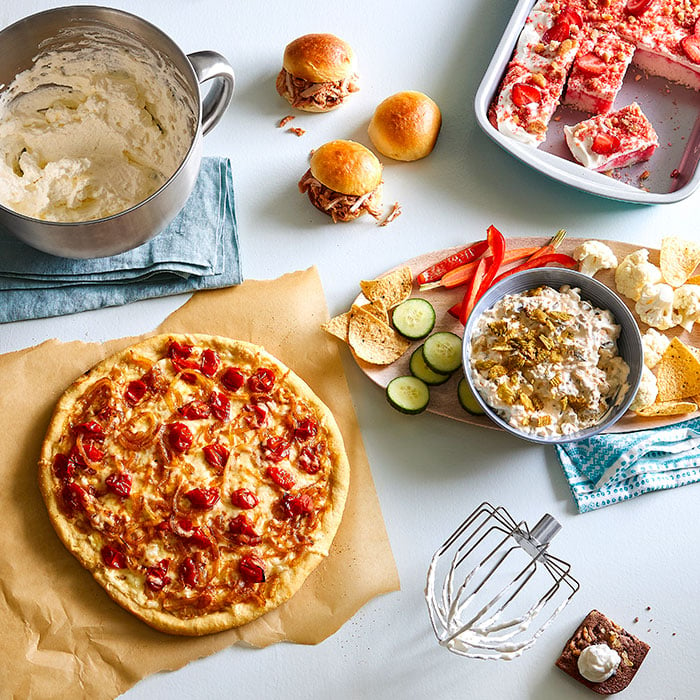
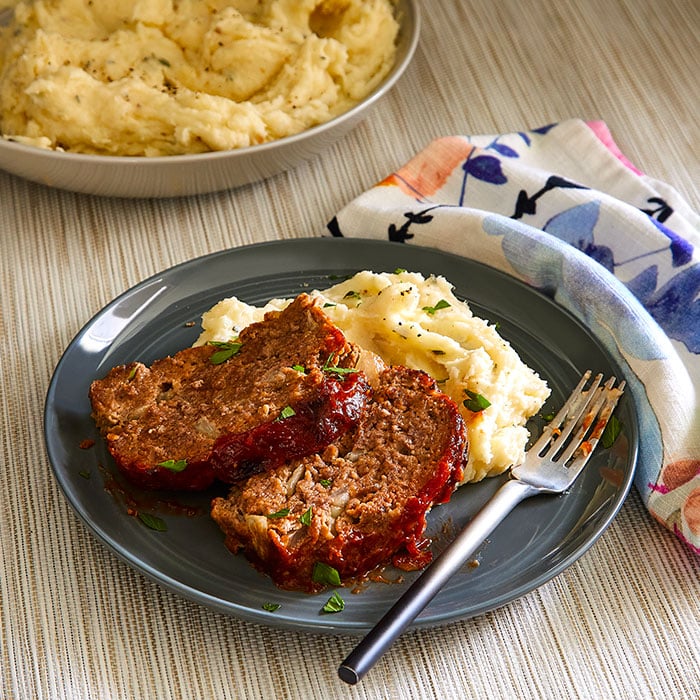
Plus, the Deluxe Stand Mixer goes beyond baking! Use the scraping beater to shred chicken and mash potatoes, the whisk to whip yogurt and whipped cream, and the dough hook to knead pizza dough. And if you’re not sure which accessory to use, the LCD display clearly shows you the recommended accessory for your chosen preset along with the time and mixing speed, so you can mix anything from meatloaf to sweet dough like a pro.
Guarantee
- 2-year guarantee
Product Details
- 12½'' (31 cm) x 16¼'' (41 cm) with the bowl in place
- 5.75-qt. (5.4-L) capacity
- 500 watts
- Premium metallic graphite gray finish
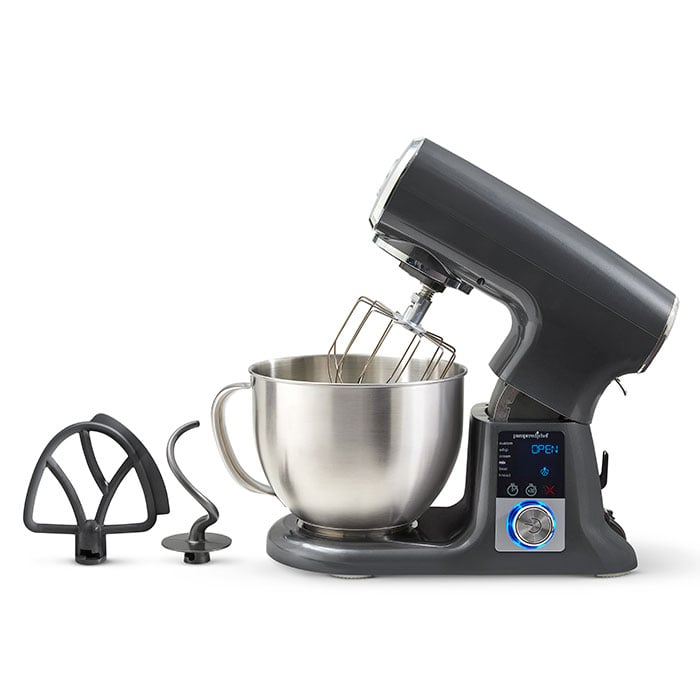
- Includes a 5.75-qt. (5.4-L) stainless steel bowl, scraping beater, whisk, dough hook, and cooking guide
- Bowl and accessories are dishwasher-safe
- 5 preprogrammed settings: Whip, Cream, Mix, Beat, and Knead
- Custom setting: Set a specific time and choose from 8 manual speeds
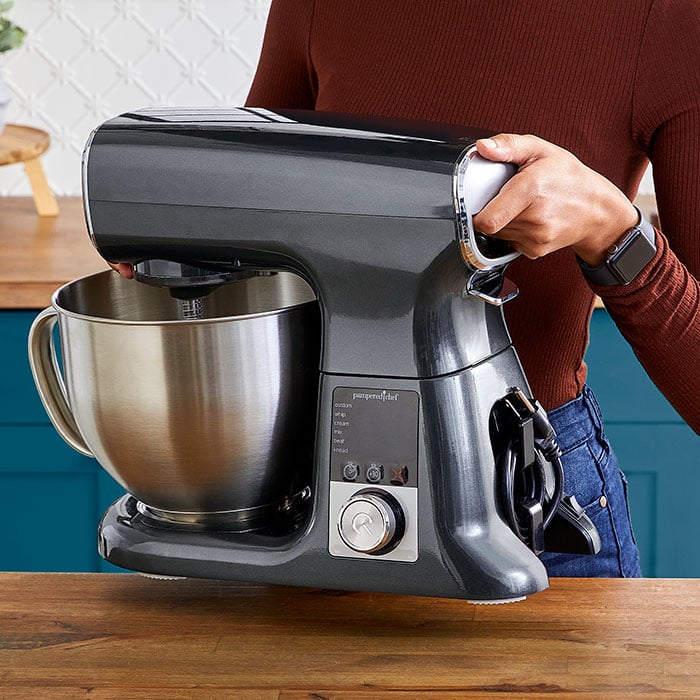
- Its even weight distribution, built-in carrying handles, and compact cord storage makes it easy to move around the kitchen
Recommended
- Getting Started With Your Deluxe Stand Mixer
- 10 Surprising Things You Can Make With the Deluxe Stand Mixer
More Unforgettable Features
These no-guess presets take the guesswork out of whipping, creaming, mixing, beating, and kneading. Each preset starts slow and ramps up in speed, minimizing the mess!

Whip Setting
Make whipped cream, meringue, butter, and egg salad.
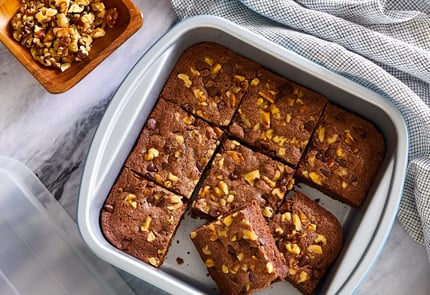
Mix Setting
Slowly combine ingredients for brownies, muffins, quick breads, dips, and meatballs.

Knead Setting
Bring together ingredients for bread, pizza dough, and cinnamon rolls in less time than by kneading by hand.

Cream Setting
Create light, fluffy cakes, cookies, and frosting every time.

Beat Setting
Add the perfect amount of air to cake batters, frostings, and mashed potatoes.

Custom Setting
Set a specific time and choose from 8 manual speeds to make recipes you already know and love.
-
Use & Care
Use & Care
Use & Care
IMPORTANT SAFEGUARDS
- Read, understand, and follow all Safety and Use Instructions to avoid injury.
WARNING
- • Do not place the Deluxe Stand Mixer on, near, or inside an external heat source (such as on a hot gas or electric burner or in a heated oven).
- • Avoid contact with any moving parts while in operation. Keep your hands, hair, clothing, and spatulas and other utensils away from the unit during operation to reduce the risk of injury to persons and/or damage to the Deluxe Stand Mixer.
- • To protect against electrical shock, do not immerse or operate the unit, cord, or plugs in water or other liquid.
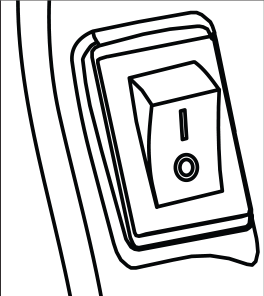
- • Before adding or removing parts or accessories, let the unit completely stop and place the On/Off switch in the Off position and unplug the power cord.
- • Turn the appliance OFF, then unplug from the outlet when not in use, before assembling or disassembling parts and before cleaning. To unplug, grasp the plug and pull from the outlet. Never pull from the power cord.
- • Do not move the Deluxe Stand Mixer while in operation. Make sure the Deluxe Stand Mixer is off and unplugged before moving.
- • Do not open or close the tilting mixer head during operation.
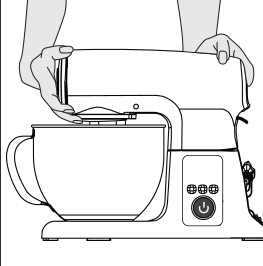
- • Use caution when moving the unit. Make sure the bowl and tilting mixer head are secure and locked in the closed position. Always use two hands when moving the unit.
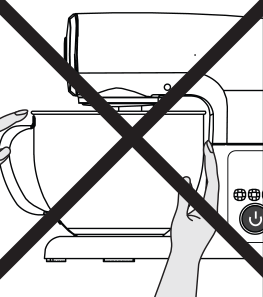
- • Do not use the bowl or bowl handle to move the unit.
- • Do not use the Deluxe Stand Mixer for anything other than the intended use as outlined in this use and care manual.
- • Do not use outdoors; intended for indoor countertop use only.
- • Only use accessories or attachments that are sold by Pampered Chef and are designed for use with this unit. Do not use accessories or attachments with, or in, non-approved appliances (such as an oven, microwave, stovetop, grill, etc.), as this may cause damage which can negatively affect performance of the unit.
- • The use of non-Pampered Chef or non-approved accessories or attachments may cause injuries or damage to the unit. Any accessory or attachment that has been damaged in any manner must not be used.
- • Check that the power switch is Off before plugging and unplugging the cord into the wall outlet. To unplug, grasp the plug and pull from the outlet; never pull from the power cord.
- • Do not let the cord touch hot surfaces.
- • When in use, do not place the Deluxe Stand Mixer against a wall or against other appliances. Leave at least 6" (15 cm) of free space on the back and sides of the unit. Do not operate the unit on or near materials such as tablecloths, towels, and curtains. Do not place anything on top of the unit.
- • Let the unit stop completely, unplug, and remove attachments and accessories when not in use and before cleaning and storing.
- • When the tilting mixer head is open, keep your hands clear of the hinge area.
- • Keep the unit and cord away from children. Never drape the cord over the edge of a counter, never use an outlet below the counter, and never use with a power strip or extension cord.
- • A short power-supply cord is used to reduce the risk resulting from children grabbing the cord, becoming entangled in, or tripping over a longer cord.
- • Do not operate the unit on an unstable or wet surface.
- • This appliance is not intended for use by persons (including children) with reduced physical, sensory, or mental capabilities, or lack of experience and knowledge, unless they are closely supervised and instructed concerning use of the appliance by a person responsible for their safety. Close supervision is necessary when any appliance is used by or near children. Children should be supervised to ensure that they do not play with the appliance.
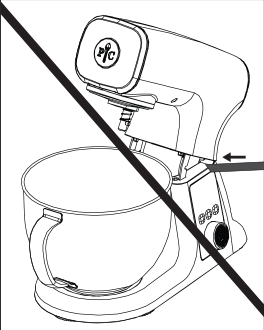
- • Do not put foreign objects into gaps and crevices of the unit. It is prohibited to insert utensils or other foreign matter into gaps or crevices. This may cause electric shock or other dangerous accidents.
- • Do not attempt to modify or repair the Deluxe Stand Mixer or any part inside, as this may cause electric shock, fire, melting, or injury.
- • Use caution while adding ingredients when the unit is running.
- • Do not remove the Attachment Hub Cover while the Deluxe Stand Mixer is running.
- • Do not operate any appliance with a damaged cord or plug or after the appliance malfunctions, or is dropped or damaged in any manner. Contact the manufacturer at their customer service telephone number for information on examination, repair, or adjustment. Call the Solution Center at (888) 687-2433 (United States) or (800) 342-2433 (Canada) for assistance.
IMPORTANT SAFEGUARDS
- When using electrical appliances, basic safety precautions should always be followed including the following:
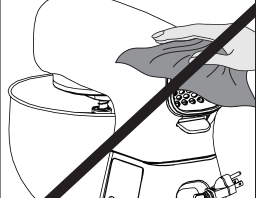
- • Never cover the air vents. Doing so may cause overheating and damage the unit.
- • This unit is for household use only; it is not intended for commercial use.
- • Do not operate for more than 10 minutes continuously as it may cause damage to the unit.
- • After each use, refer to the “Cleaning” section for proper maintenance.
- • Do not leave the unit unattended while in use.
- • Never connect this unit to an external timer switch or separate remote-control system.
- • Do not open under a low cabinet.
- • Do not store the unit in direct sunlight.
ELECTRICAL HAZARD
- When using electrical appliances, basic safety precautions should always be followed including the following:
- • Persons with pacemakers or users of hearing aids or cochlear implants should consult with authorized medical personnel before use. Refer to the instructions of medical equipment providers.
- • Do not use anything other than a 120V-60Hz power outlet. Failure to use AC 120V-60Hz electricity or dedicated electricity can cause electrical shock, fire, or other dangerous accidents.
- • Do not immerse, submerge, or sprinkle the unit with liquids. Doing so could cause electric shock and electrical short.
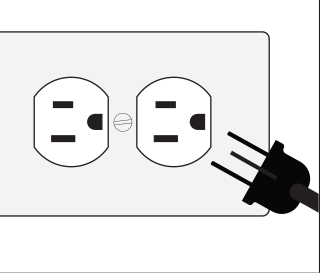
- • To reduce the risk of electric shock, this plug is intended to fit into a grounded three-prong outlet only one way. If the plug does not fit, contact a qualified electrician.
- • Do not remove the ground prong.
- • Inspect the cord and unit for damage before each use.
- • Do not attempt to modify the plug in any way.
- • If the plug fits loosely into the outlet, or if the outlet feels warm, do not use that outlet.
- • Do not insert or remove the plug with wet hands. To avoid injuries due to electric shock, make sure your hands are dry before plugging and unplugging the unit.
- • Do not plug the Deluxe Stand Mixer into a power strip, extension cord, or an outlet with another appliance; it must be used with a dedicated outlet. A three-prong grounded socket of more than 10A rated current must be used alone. If shared with other appliances, the socket may cause electrical shock, fire, or other dangerous accidents.
- • Do not use an adaptor with this appliance.
- • Always unplug the unit when not in use to prevent accidents (such as fire, electrical leakage, failure, etc.).
- • Do not attempt to defeat any safety interlock mechanisms.
- • Remove beaters from mixer before washing.
SAVE THESE INSTRUCTIONS
PARTS A. Tilting mixer head
B. Attachment hub cover
C. Mixing shaft
D. 5.75-qt. (5.4-L) stainless steel bowl
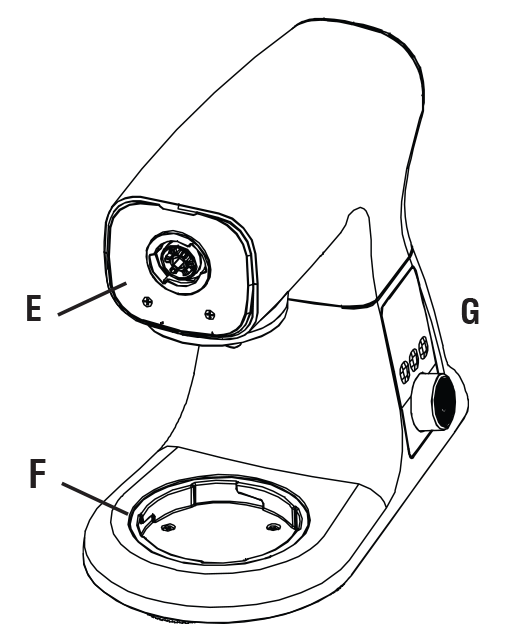
E. Attachment hub
F. Bowl locking plate
G. Digital display
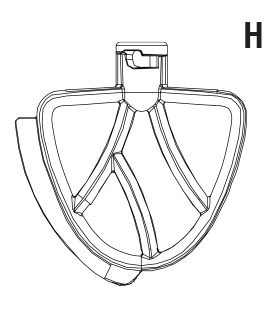
H. Scraping beater
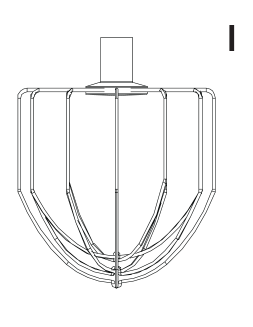
I. Whisk
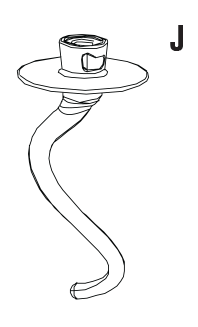
J. Dough hook
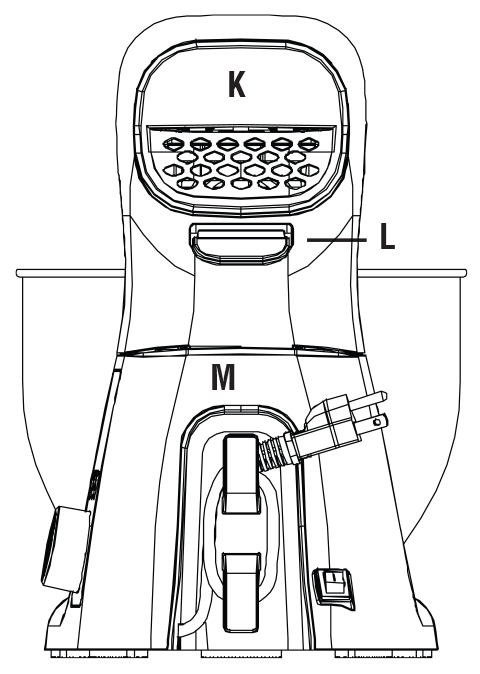
K. Carrying handle
L. Open/close lever
M. Cord storage
N. On/Off switch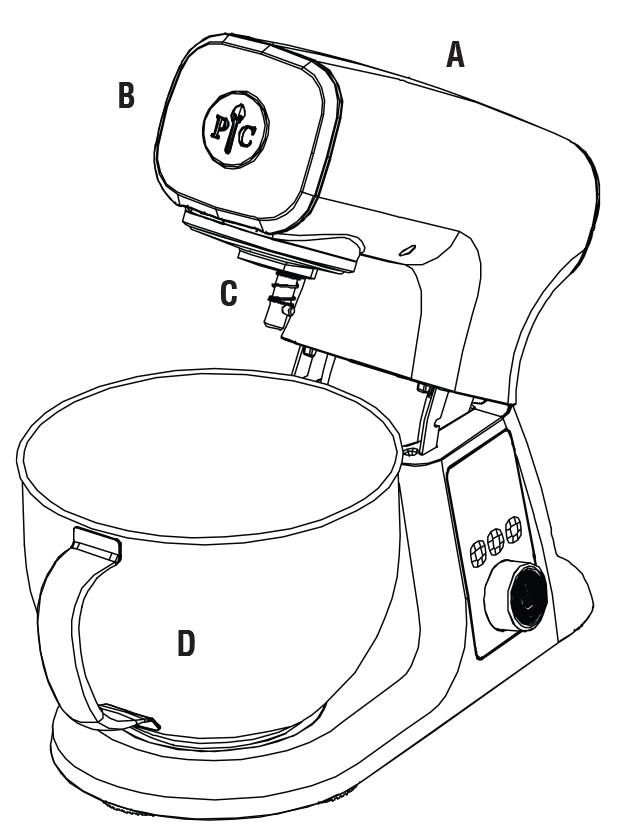
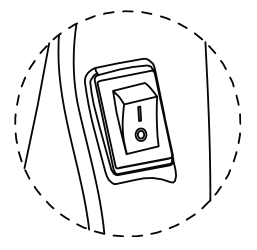
DISPLAY AND MENU SETTINGS
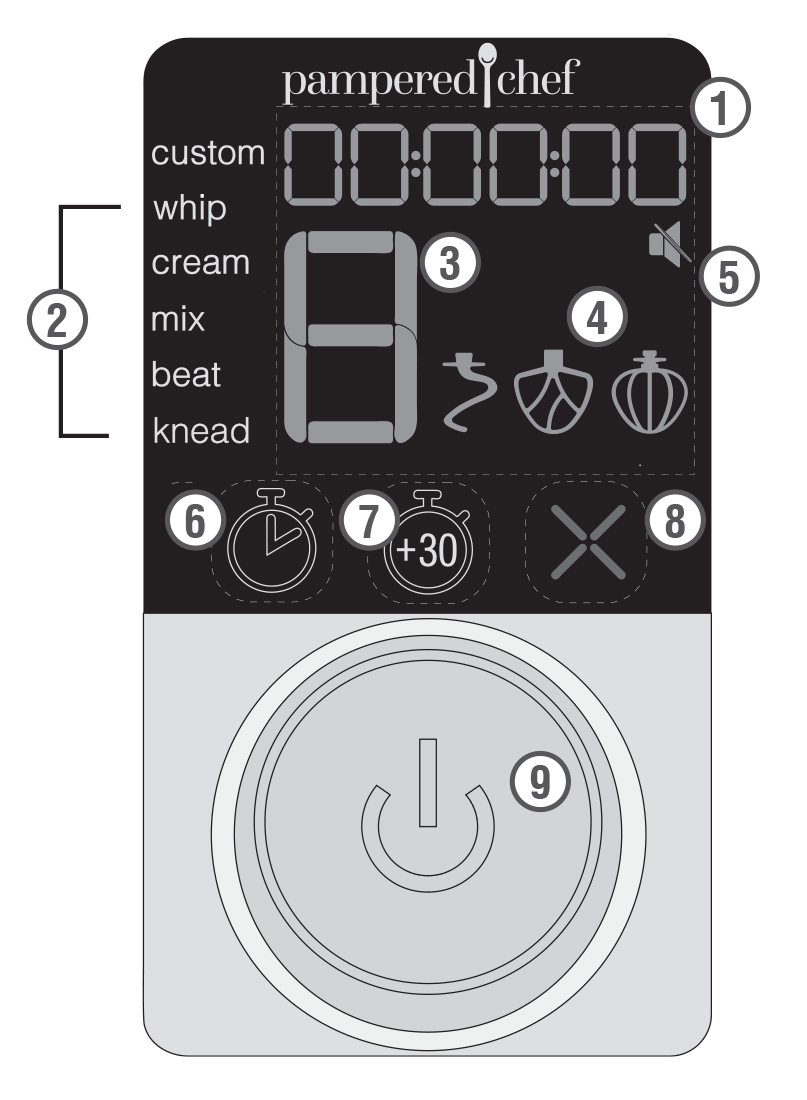
1. Timer Display
The timer counts down when using the presets. When using the CUSTOM setting, it automatically counts up unless you use the timer button to set the time, then it will count down. See “How to Use the Custom Setting.”
2. Presets
Each preset has been programmed to the optimal speeds for the operation and a default time. The speed cannot be changed but the time can. See “How to Use the Mixing Presets.”
3. Speed Indicator
Displays the speed from 1–8.
4. Recommended Accessory
When you select a preset, the recommended accessory (scraping beater, whisk, dough hook) illuminates.
5. Speaker Off Icon
To mute the scrolling, selecting, and starting beeps press and hold the START and CANCEL together for two seconds. Repeat to unmute.6. Timer Button
Press while in the CUSTOM setting to set time.
7. Add 30 Seconds Button>
Press to add 30 seconds to the timer. Note: If pressed within 5 seconds after mixing finishes, it adds 30 seconds to the last mixing speed. If pressed 5 seconds after mixing finishes, it adds 30 seconds at speed 3.
8. Cancel Button
Press at any time stop mixing and return to the default CUSTOM setting.
9. Selector Wheel/Start Button
Turn the wheel to select presets, mixing time, and mixing speed. Press the wheel to select and start. During mixing, you can press the wheel to pause mixing.CLEANING
- • WARNING: Before cleaning the unit, make sure the mixer has stopped moving. Press the On/Off switch to Off and unplug the power cord.
- • To clean the body of the mixer, wipe clean with a damp cloth. Do not use household/commercial cleaners. Wipe off the mixing shaft frequently, removing any residue that may accumulate. Do not immerse in water.
- • The bowl, scraping beater, whisk, and dough hook accessories are dishwasher-safe. Place the accessories away from heating element.
- • The bowl will scratch with use. This is considered normal and does not fall under the guarantee.
- • Clean before using for the first time and after each use.
- • Make sure all parts are clean and dry before storing. Let the mixer stop completely, switch to Off, unplug, and remove the attachments and accessories when not in use and before cleaning and storing.
- • Do not store accessories on the mixing shaft.
IMPORTANT PRECAUTIONS
Before First Use:
- • Remove all packaging.
- • Read all instructions in this document.
- • Clean all parts. See the “Cleaning” section for instructions.
PREPARING TO USE
- • Make sure the unit is unplugged and the On/Off switch is in the Off position.
- • Gently pull up on the open/close lever to lift the tilting mixer head up.
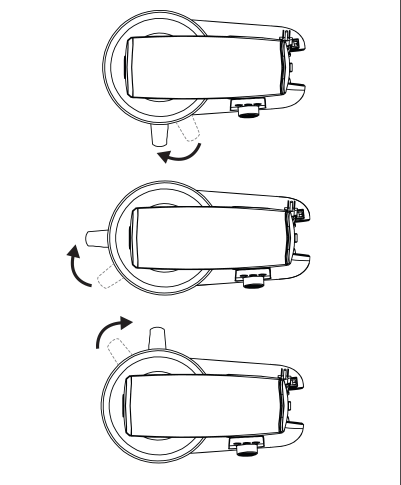
- • Twist the bowl into place. The bowl can be placed on in any of three positions: With the handle on the right side, left side, or in the front. Place the bowl with the handle slightly to the right of the handle’s position you’d like and turn clockwise until the bowl is secure in place.
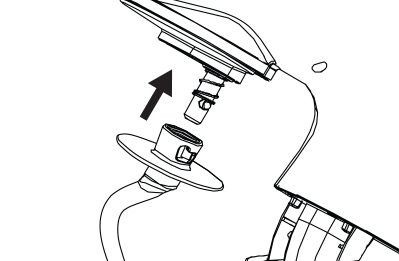
- • To add either the dough hook, scraping beater, or whisk to the mixing shaft, push the accessory up into the shaft, and turn to the right so that the knob is in the groove.
Note: Only use one accessory or attachment at a time.
Note: When using a preset, the recommended accessory will be displayed.
- • Gently pull up on open/close lever and push the tilting mixer head down until it secures into place.
- • Plug the unit in and press the On/Off switch in back into the On position. Lights will illuminate briefly
SEE HOW IT WORKS: INITIAL TEST RUN
This takes less than five minutes.
- • Follow the steps in the “Preparing to Use” section using the whisk.
- • Add 1 cup of water to the bowl.
- • CUSTOM will be blinking on the display. If not, turn the selector wheel to CUSTOM and press the selector wheel to select.
- • Turn the selector wheel to select speed 3.
- • Press the selector wheel again to start.
- • Let the mixer run until the timer reaches 2 minutes.
- • Press the CANCEL BUTTON to cancel.
HOW TO USE THE CUSTOM SETTING
The timer can count up or down in the CUSTOM setting.
Count-up timer:
- • Follow all the steps in the “Preparing to Use” section.
- • CUSTOM will be blinking on the display. If not, turn the selector wheel to CUSTOM and press the selector wheel to select.
- • The speed will default to 1. Use the selector wheel to adjust the speed and press the wheel to start.
- • The timer will begin counting up. Press CANCEL to cancel the setting.
Count-down timer:
- • After selecting the CUSTOM setting, press the timer button and use the selector wheel to scroll to the desired time; press the selector wheel to select. Select the speed and press the wheel again to start the operation and the timer. When the timer is done, the mixer will stop and the display will say “End.”
Note: You can adjust the speed during mixing by rotating the selector wheel to a lower or higher speed.
Note: You can press the selector wheel while mixing to pause the function. The display will flash “Pause.” Press the wheel again to resume the function. If the open/close lever is used during the setting, the display will say “Pause.” Once the tilting mixer head has been closed, press the selector wheel to resume the function.
HOW TO USE MIXING PRESETS
- • Follow all the steps in the “Preparing to Use” section.
- • Use the selector wheel to scroll through presets. Once the desired preset blinks, press START to select.
- • The default time will display. Use the selector wheel to adjust the time if desired.
Note: The default speed cannot be changed in the presets. To adjust the speed, use the Custom setting. - • Press START to start.
- • The timer will begin counting down.
- • When the timer is done, the mixer will stop, beep five times, and the display will say “End.” You’ll hear beeps every two minutes for 16 minutes until either the selector wheel is pressed, the open/close lever is opened, or CANCEL is pressed.
Note: You can press the selector wheel while mixing to pause the function. The display will flash “Pause.” Press the wheel again to resume the function. If the open/close lever is used during the setting, the display will say “Pause.” Once the tilting mixer head has been closed, press the wheel to resume the function.
Mixing Preset Default Time Minimum Time Maximum Time Recommended Accessory Notes WHIP 3 min,
30 sec2 min,
10 sec10 min Whisk Use to incorporate lots of air for fluffy whipped cream, meringues, etc.
Note: The timing for the Whip setting will provide the best results for Pampered Chef recipes. However, factors such as the freshness of and temperature of ingredients may impact results. Please adjust the setting timing for recipes as needed.CREAM 2 min,
50 sec50 sec 10 min Scraping beater Creaming is when sugar and softened butter combine into a uniform, fluffy, and smooth mixture where the sugar is dissolved and evenly dispersed. Often the first step in dough and batter recipes. MIX 2min,
30 sec45 sec 10 min Scraping beater Use to gently incorporate wet and dry ingredients without overmixing. Helps keep brownies, muffins, and quick breads tender. BEAT 2 min 30 sec 10 min Scraping beater Use to thoroughly incorporate ingredients without overmixing such as adding eggs to batter or making frosting and icing. KNEAD 8 min 4 min 10 min Dough hook Kneading helps develop the proteins and gluten in the flour to provide structure and strength to dough and overall texture to bread. Note: When using a preset, the speed slowly increases so ingredients don’t splash. The minimum time on each preset reduces the amount of time mixing is at the final highest speed. The maximum time will add the amount of time at the final highest speed. If the Add 30 Seconds button is pressed during a preset, it will add 30 seconds to the final highest speed in that preset.
TROUBLESHOOTING
The cases in the following tables do not always indicate a faulty product. Problem Possible Reason Solution There’s an odor when using the first time. This is common with electric motors. No action is needed. This can occur on the first use and is considered harmless. Error Code 1 The motor is not working. Turn off and unplug the unit. Let cool for 30 minutes, then plug in and turn on. If the code persists, call the Solution Center at (888) 687-2433 (United States) or (800) 342-2433 (Canada) for assistance. Error Code 2 Speed malfunction Turn off and unplug the unit. Try another outlet and be sure nothing else is plugged into that outlet. If the code persists, call the Solution Center at (888) 687-2433 (United States) or (800) 342-2433 (Canada) for assistance. Error Code 3 The motor overloaded from mixing a heavy load such as bread dough. Turn off, unplug, and remove the accessory. Reduce the recipe volume and/or thickness. Replace the accessory, plug in, turn on, and try again. If the code persists, call the Solution Center at (888) 687-2433 (United States) or (800) 342-2433 (Canada) for assistance. GUARANTEE
- • Two-year guarantee for noncommercial use.
Guarantee
Use & Care
IMPORTANT SAFEGUARDS
- Read, understand, and follow all Safety and Use Instructions to avoid injury.
WARNING
- • Do not place the Deluxe Stand Mixer on, near, or inside an external heat source (such as on a hot gas or electric burner or in a heated oven).
- • Avoid contact with any moving parts while in operation. Keep your hands, hair, clothing, and spatulas and other utensils away from the unit during operation to reduce the risk of injury to persons and/or damage to the Deluxe Stand Mixer.
- • To protect against electrical shock, do not immerse or operate the unit, cord, or plugs in water or other liquid.

- • Before adding or removing parts or accessories, let the unit completely stop and place the On/Off switch in the Off position and unplug the power cord.
- • Turn the appliance OFF, then unplug from the outlet when not in use, before assembling or disassembling parts and before cleaning. To unplug, grasp the plug and pull from the outlet. Never pull from the power cord.
- • Do not move the Deluxe Stand Mixer while in operation. Make sure the Deluxe Stand Mixer is off and unplugged before moving.
- • Do not open or close the tilting mixer head during operation.

- • Use caution when moving the unit. Make sure the bowl and tilting mixer head are secure and locked in the closed position. Always use two hands when moving the unit.

- • Do not use the bowl or bowl handle to move the unit.
- • Do not use the Deluxe Stand Mixer for anything other than the intended use as outlined in this use and care manual.
- • Do not use outdoors; intended for indoor countertop use only.
- • Only use accessories or attachments that are sold by Pampered Chef and are designed for use with this unit. Do not use accessories or attachments with, or in, non-approved appliances (such as an oven, microwave, stovetop, grill, etc.), as this may cause damage which can negatively affect performance of the unit.
- • The use of non-Pampered Chef or non-approved accessories or attachments may cause injuries or damage to the unit. Any accessory or attachment that has been damaged in any manner must not be used.
- • Check that the power switch is Off before plugging and unplugging the cord into the wall outlet. To unplug, grasp the plug and pull from the outlet; never pull from the power cord.
- • Do not let the cord touch hot surfaces.
- • When in use, do not place the Deluxe Stand Mixer against a wall or against other appliances. Leave at least 6" (15 cm) of free space on the back and sides of the unit. Do not operate the unit on or near materials such as tablecloths, towels, and curtains. Do not place anything on top of the unit.
- • Let the unit stop completely, unplug, and remove attachments and accessories when not in use and before cleaning and storing.
- • When the tilting mixer head is open, keep your hands clear of the hinge area.
- • Keep the unit and cord away from children. Never drape the cord over the edge of a counter, never use an outlet below the counter, and never use with a power strip or extension cord.
- • A short power-supply cord is used to reduce the risk resulting from children grabbing the cord, becoming entangled in, or tripping over a longer cord.
- • Do not operate the unit on an unstable or wet surface.
- • This appliance is not intended for use by persons (including children) with reduced physical, sensory, or mental capabilities, or lack of experience and knowledge, unless they are closely supervised and instructed concerning use of the appliance by a person responsible for their safety. Close supervision is necessary when any appliance is used by or near children. Children should be supervised to ensure that they do not play with the appliance.

- • Do not put foreign objects into gaps and crevices of the unit. It is prohibited to insert utensils or other foreign matter into gaps or crevices. This may cause electric shock or other dangerous accidents.
- • Do not attempt to modify or repair the Deluxe Stand Mixer or any part inside, as this may cause electric shock, fire, melting, or injury.
- • Use caution while adding ingredients when the unit is running.
- • Do not remove the Attachment Hub Cover while the Deluxe Stand Mixer is running.
- • Do not operate any appliance with a damaged cord or plug or after the appliance malfunctions, or is dropped or damaged in any manner. Contact the manufacturer at their customer service telephone number for information on examination, repair, or adjustment. Call the Solution Center at (888) 687-2433 (United States) or (800) 342-2433 (Canada) for assistance.
IMPORTANT SAFEGUARDS
- When using electrical appliances, basic safety precautions should always be followed including the following:

- • Never cover the air vents. Doing so may cause overheating and damage the unit.
- • This unit is for household use only; it is not intended for commercial use.
- • Do not operate for more than 10 minutes continuously as it may cause damage to the unit.
- • After each use, refer to the “Cleaning” section for proper maintenance.
- • Do not leave the unit unattended while in use.
- • Never connect this unit to an external timer switch or separate remote-control system.
- • Do not open under a low cabinet.
- • Do not store the unit in direct sunlight.
ELECTRICAL HAZARD
- When using electrical appliances, basic safety precautions should always be followed including the following:
- • Persons with pacemakers or users of hearing aids or cochlear implants should consult with authorized medical personnel before use. Refer to the instructions of medical equipment providers.
- • Do not use anything other than a 120V-60Hz power outlet. Failure to use AC 120V-60Hz electricity or dedicated electricity can cause electrical shock, fire, or other dangerous accidents.
- • Do not immerse, submerge, or sprinkle the unit with liquids. Doing so could cause electric shock and electrical short.

- • To reduce the risk of electric shock, this plug is intended to fit into a grounded three-prong outlet only one way. If the plug does not fit, contact a qualified electrician.
- • Do not remove the ground prong.
- • Inspect the cord and unit for damage before each use.
- • Do not attempt to modify the plug in any way.
- • If the plug fits loosely into the outlet, or if the outlet feels warm, do not use that outlet.
- • Do not insert or remove the plug with wet hands. To avoid injuries due to electric shock, make sure your hands are dry before plugging and unplugging the unit.
- • Do not plug the Deluxe Stand Mixer into a power strip, extension cord, or an outlet with another appliance; it must be used with a dedicated outlet. A three-prong grounded socket of more than 10A rated current must be used alone. If shared with other appliances, the socket may cause electrical shock, fire, or other dangerous accidents.
- • Do not use an adaptor with this appliance.
- • Always unplug the unit when not in use to prevent accidents (such as fire, electrical leakage, failure, etc.).
- • Do not attempt to defeat any safety interlock mechanisms.
- • Remove beaters from mixer before washing.
SAVE THESE INSTRUCTIONS
PARTS A. Tilting mixer head
B. Attachment hub cover
C. Mixing shaft
D. 5.75-qt. (5.4-L) stainless steel bowl
E. Attachment hub
F. Bowl locking plate
G. Digital display
H. Scraping beater
I. Whisk
J. Dough hook
K. Carrying handle
L. Open/close lever
M. Cord storage
N. On/Off switch


DISPLAY AND MENU SETTINGS

1. Timer Display
The timer counts down when using the presets. When using the CUSTOM setting, it automatically counts up unless you use the timer button to set the time, then it will count down. See “How to Use the Custom Setting.”
2. Presets
Each preset has been programmed to the optimal speeds for the operation and a default time. The speed cannot be changed but the time can. See “How to Use the Mixing Presets.”
3. Speed Indicator
Displays the speed from 1–8.
4. Recommended Accessory
When you select a preset, the recommended accessory (scraping beater, whisk, dough hook) illuminates.
5. Speaker Off Icon
To mute the scrolling, selecting, and starting beeps press and hold the START and CANCEL together for two seconds. Repeat to unmute.6. Timer Button
Press while in the CUSTOM setting to set time.
7. Add 30 Seconds Button>
Press to add 30 seconds to the timer. Note: If pressed within 5 seconds after mixing finishes, it adds 30 seconds to the last mixing speed. If pressed 5 seconds after mixing finishes, it adds 30 seconds at speed 3.
8. Cancel Button
Press at any time stop mixing and return to the default CUSTOM setting.
9. Selector Wheel/Start Button
Turn the wheel to select presets, mixing time, and mixing speed. Press the wheel to select and start. During mixing, you can press the wheel to pause mixing.CLEANING
- • WARNING: Before cleaning the unit, make sure the mixer has stopped moving. Press the On/Off switch to Off and unplug the power cord.
- • To clean the body of the mixer, wipe clean with a damp cloth. Do not use household/commercial cleaners. Wipe off the mixing shaft frequently, removing any residue that may accumulate. Do not immerse in water.
- • The bowl, scraping beater, whisk, and dough hook accessories are dishwasher-safe. Place the accessories away from heating element.
- • The bowl will scratch with use. This is considered normal and does not fall under the guarantee.
- • Clean before using for the first time and after each use.
- • Make sure all parts are clean and dry before storing. Let the mixer stop completely, switch to Off, unplug, and remove the attachments and accessories when not in use and before cleaning and storing.
- • Do not store accessories on the mixing shaft.
IMPORTANT PRECAUTIONS
Before First Use:
- • Remove all packaging.
- • Read all instructions in this document.
- • Clean all parts. See the “Cleaning” section for instructions.
PREPARING TO USE
- • Make sure the unit is unplugged and the On/Off switch is in the Off position.
- • Gently pull up on the open/close lever to lift the tilting mixer head up.

- • Twist the bowl into place. The bowl can be placed on in any of three positions: With the handle on the right side, left side, or in the front. Place the bowl with the handle slightly to the right of the handle’s position you’d like and turn clockwise until the bowl is secure in place.

- • To add either the dough hook, scraping beater, or whisk to the mixing shaft, push the accessory up into the shaft, and turn to the right so that the knob is in the groove.
Note: Only use one accessory or attachment at a time.
Note: When using a preset, the recommended accessory will be displayed.
- • Gently pull up on open/close lever and push the tilting mixer head down until it secures into place.
- • Plug the unit in and press the On/Off switch in back into the On position. Lights will illuminate briefly
SEE HOW IT WORKS: INITIAL TEST RUN
This takes less than five minutes.
- • Follow the steps in the “Preparing to Use” section using the whisk.
- • Add 1 cup of water to the bowl.
- • CUSTOM will be blinking on the display. If not, turn the selector wheel to CUSTOM and press the selector wheel to select.
- • Turn the selector wheel to select speed 3.
- • Press the selector wheel again to start.
- • Let the mixer run until the timer reaches 2 minutes.
- • Press the CANCEL BUTTON to cancel.
HOW TO USE THE CUSTOM SETTING
The timer can count up or down in the CUSTOM setting.
Count-up timer:
- • Follow all the steps in the “Preparing to Use” section.
- • CUSTOM will be blinking on the display. If not, turn the selector wheel to CUSTOM and press the selector wheel to select.
- • The speed will default to 1. Use the selector wheel to adjust the speed and press the wheel to start.
- • The timer will begin counting up. Press CANCEL to cancel the setting.
Count-down timer:
- • After selecting the CUSTOM setting, press the timer button and use the selector wheel to scroll to the desired time; press the selector wheel to select. Select the speed and press the wheel again to start the operation and the timer. When the timer is done, the mixer will stop and the display will say “End.”
Note: You can adjust the speed during mixing by rotating the selector wheel to a lower or higher speed.
Note: You can press the selector wheel while mixing to pause the function. The display will flash “Pause.” Press the wheel again to resume the function. If the open/close lever is used during the setting, the display will say “Pause.” Once the tilting mixer head has been closed, press the selector wheel to resume the function.
HOW TO USE MIXING PRESETS
- • Follow all the steps in the “Preparing to Use” section.
- • Use the selector wheel to scroll through presets. Once the desired preset blinks, press START to select.
- • The default time will display. Use the selector wheel to adjust the time if desired.
Note: The default speed cannot be changed in the presets. To adjust the speed, use the Custom setting. - • Press START to start.
- • The timer will begin counting down.
- • When the timer is done, the mixer will stop, beep five times, and the display will say “End.” You’ll hear beeps every two minutes for 16 minutes until either the selector wheel is pressed, the open/close lever is opened, or CANCEL is pressed.
Note: You can press the selector wheel while mixing to pause the function. The display will flash “Pause.” Press the wheel again to resume the function. If the open/close lever is used during the setting, the display will say “Pause.” Once the tilting mixer head has been closed, press the wheel to resume the function.
Mixing Preset Default Time Minimum Time Maximum Time Recommended Accessory Notes WHIP 3 min,
30 sec2 min,
10 sec10 min Whisk Use to incorporate lots of air for fluffy whipped cream, meringues, etc.
Note: The timing for the Whip setting will provide the best results for Pampered Chef recipes. However, factors such as the freshness of and temperature of ingredients may impact results. Please adjust the setting timing for recipes as needed.CREAM 2 min,
50 sec50 sec 10 min Scraping beater Creaming is when sugar and softened butter combine into a uniform, fluffy, and smooth mixture where the sugar is dissolved and evenly dispersed. Often the first step in dough and batter recipes. MIX 2min,
30 sec45 sec 10 min Scraping beater Use to gently incorporate wet and dry ingredients without overmixing. Helps keep brownies, muffins, and quick breads tender. BEAT 2 min 30 sec 10 min Scraping beater Use to thoroughly incorporate ingredients without overmixing such as adding eggs to batter or making frosting and icing. KNEAD 8 min 4 min 10 min Dough hook Kneading helps develop the proteins and gluten in the flour to provide structure and strength to dough and overall texture to bread. Note: When using a preset, the speed slowly increases so ingredients don’t splash. The minimum time on each preset reduces the amount of time mixing is at the final highest speed. The maximum time will add the amount of time at the final highest speed. If the Add 30 Seconds button is pressed during a preset, it will add 30 seconds to the final highest speed in that preset.
TROUBLESHOOTING
The cases in the following tables do not always indicate a faulty product. Problem Possible Reason Solution There’s an odor when using the first time. This is common with electric motors. No action is needed. This can occur on the first use and is considered harmless. Error Code 1 The motor is not working. Turn off and unplug the unit. Let cool for 30 minutes, then plug in and turn on. If the code persists, call the Solution Center at (888) 687-2433 (United States) or (800) 342-2433 (Canada) for assistance. Error Code 2 Speed malfunction Turn off and unplug the unit. Try another outlet and be sure nothing else is plugged into that outlet. If the code persists, call the Solution Center at (888) 687-2433 (United States) or (800) 342-2433 (Canada) for assistance. Error Code 3 The motor overloaded from mixing a heavy load such as bread dough. Turn off, unplug, and remove the accessory. Reduce the recipe volume and/or thickness. Replace the accessory, plug in, turn on, and try again. If the code persists, call the Solution Center at (888) 687-2433 (United States) or (800) 342-2433 (Canada) for assistance. GUARANTEE
- • Two-year guarantee for noncommercial use.
Guarantee


 United States (en)
 Germany (de)
 Austria (de)
 France (fr)
