Deluxe Electric Waffle Plates
Breakfast in a Breeze
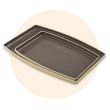
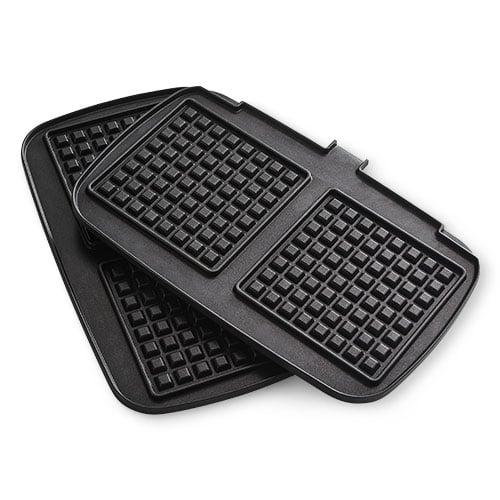
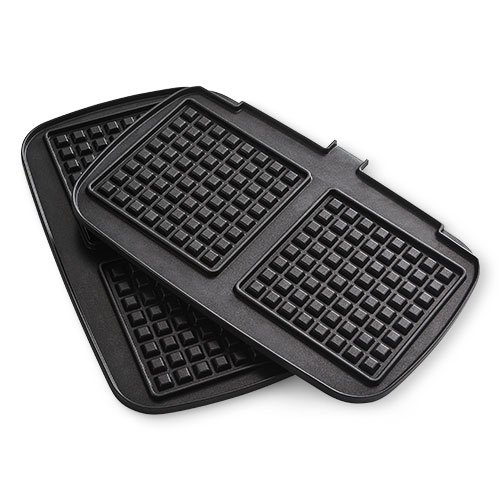
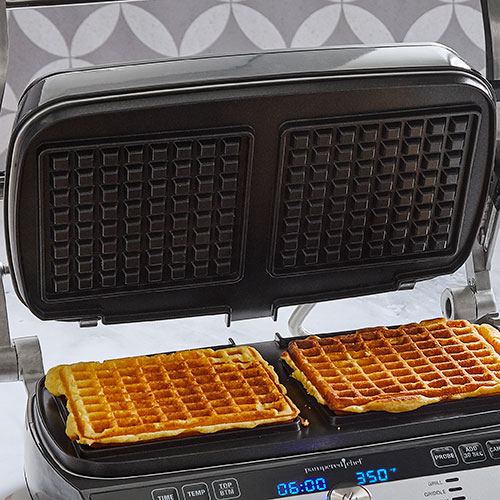
Breakfast just got better! Add even more delicious possibilities to your Deluxe Electric Grill & Griddle* with these waffle plates. Set of two nonstick plates heat quickly and evenly so your waffles turn out perfectly.
* The Deluxe Electric Grill & Griddle is sold separately. These waffle accessory plates do not make waffles without the Deluxe Electric Grill & Griddle.
Product Details
- Made without PFOA.
- Dishwasher-safe
- 14¾" x 9½" (37.5 cm x 24 cm)
Recommended:
-
Use & Care
Use & Care
Use & Care
Save these instructions.
- • Before using the Deluxe Electric Waffle Plates, review the Pampered Chef Deluxe Electric Grill & Griddle use and care.
- • The Deluxe Electric Waffles Plates can only be used with Pampered Chef’s Deluxe Electric Grill & Griddle. Do not use with other grills, griddles, or appliances.
- • Do not use if this product or the Deluxe Electric Grill & Griddle are damaged.
- • Not intended for use by or near children or persons with reduced physical, sensory, or mental capabilities or lack of experience and knowledge.
- • The plates will be hot during and after cooking. Always use oven mitts when handling or retrieving food from the plates. Always ensure that the unit and the plates are cool to the touch before inserting or removing the plates.
- • Do not touch any hot surfaces without appropriate heat-safe hand protection (e.g., oven mitts or potholders).
- • Always use caution when removing plates, as built up oil or condensation may make plates slippery.
- • Always use the appropriate heat-safe hand protection on the handle when opening and closing the unit. Some steam may appear on the handle and the unit.
SAFEGUARDS
- • Never use metal utensils, as they will scratch the nonstick plates; use only wooden or heat-safe plastic or silicone utensils.
- • Aerosol nonstick spray is not recommended; it will create a sticky residue which is difficult to clean.
CLEANING
- • Wash before first use; dishwasher-safe when placed away from the heating element.
USE AND CARE
TO INSERT THE PLATES: 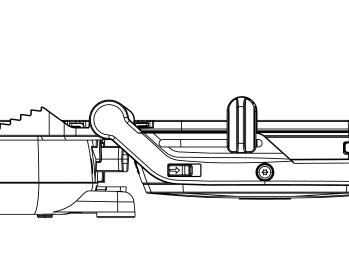
1. Adjust the unit to the Flat position by locating the hinge release lever on the right arm of the handle. With your left hand on the handle, use your right hand to slide the lever toward you. Push the handle back until the top cover rests flat on the counter. The unit should be flat with the controls directly in front of you. Insert one plate at a time. 2. Each plate is designed to fit in either the top or the bottom of the unit. While facing the unit, the drip tray should be extending past the rear of the plate installed in the bottom. 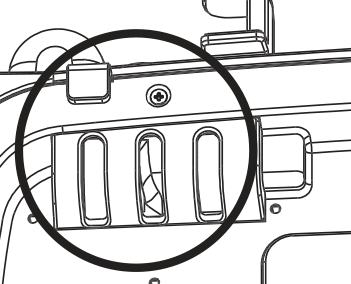
3. Locate the brackets at the rear of the unit. 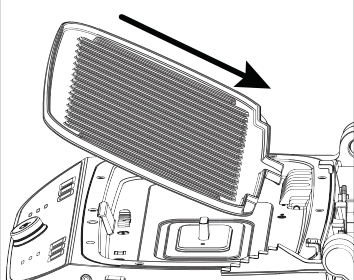
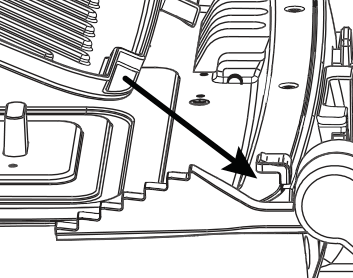
4. Tilt the back end of the plate and line up the cutouts at the back of the plate with the brackets. 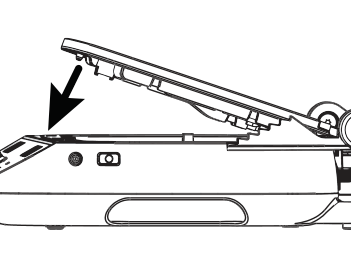
5. Slide the plate underneath the brackets and push down the front end of the plate. It will snap into place. 6. Insert the second plate like the first plate. HOW TO REMOVE THE PLATES: 1. Once the unit and plates are cool to the touch, adjust to the flat position (See To Insert the Plates section above). 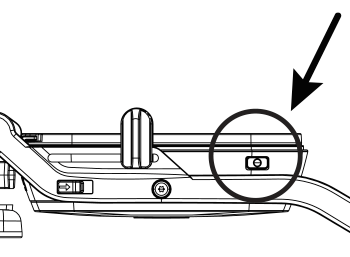
2. Locate the plate release button on one side of the unit. Press firmly on the button and the plate will pop up slightly from the base. 3. Grasp the plate with two hands, slide it out from under the brackets, and lift it out of the unit. 4. Press the plate release button in the other side to remove the other cooking plate in the same manner. 5. Carefully store the plates to avoid scratching or damaging the cooking surface. Tip: Brush the plates with oil to prevent sticking. GUARANTEE
• One-year guarantee for noncommercial use. Refer to our website or the sales receipt for details.
Guarantee
Use & Care
Save these instructions.
- • Before using the Deluxe Electric Waffle Plates, review the Pampered Chef Deluxe Electric Grill & Griddle use and care.
- • The Deluxe Electric Waffles Plates can only be used with Pampered Chef’s Deluxe Electric Grill & Griddle. Do not use with other grills, griddles, or appliances.
- • Do not use if this product or the Deluxe Electric Grill & Griddle are damaged.
- • Not intended for use by or near children or persons with reduced physical, sensory, or mental capabilities or lack of experience and knowledge.
- • The plates will be hot during and after cooking. Always use oven mitts when handling or retrieving food from the plates. Always ensure that the unit and the plates are cool to the touch before inserting or removing the plates.
- • Do not touch any hot surfaces without appropriate heat-safe hand protection (e.g., oven mitts or potholders).
- • Always use caution when removing plates, as built up oil or condensation may make plates slippery.
- • Always use the appropriate heat-safe hand protection on the handle when opening and closing the unit. Some steam may appear on the handle and the unit.
SAFEGUARDS
- • Never use metal utensils, as they will scratch the nonstick plates; use only wooden or heat-safe plastic or silicone utensils.
- • Aerosol nonstick spray is not recommended; it will create a sticky residue which is difficult to clean.
CLEANING
- • Wash before first use; dishwasher-safe when placed away from the heating element.
USE AND CARE
TO INSERT THE PLATES: 
1. Adjust the unit to the Flat position by locating the hinge release lever on the right arm of the handle. With your left hand on the handle, use your right hand to slide the lever toward you. Push the handle back until the top cover rests flat on the counter. The unit should be flat with the controls directly in front of you. Insert one plate at a time. 2. Each plate is designed to fit in either the top or the bottom of the unit. While facing the unit, the drip tray should be extending past the rear of the plate installed in the bottom. 
3. Locate the brackets at the rear of the unit. 

4. Tilt the back end of the plate and line up the cutouts at the back of the plate with the brackets. 
5. Slide the plate underneath the brackets and push down the front end of the plate. It will snap into place. 6. Insert the second plate like the first plate. HOW TO REMOVE THE PLATES: 1. Once the unit and plates are cool to the touch, adjust to the flat position (See To Insert the Plates section above). 
2. Locate the plate release button on one side of the unit. Press firmly on the button and the plate will pop up slightly from the base. 3. Grasp the plate with two hands, slide it out from under the brackets, and lift it out of the unit. 4. Press the plate release button in the other side to remove the other cooking plate in the same manner. 5. Carefully store the plates to avoid scratching or damaging the cooking surface. Tip: Brush the plates with oil to prevent sticking. GUARANTEE
• One-year guarantee for noncommercial use. Refer to our website or the sales receipt for details.
Guarantee


 United States (en)
 Germany (de)
 Austria (de)
 France (fr)
