
 United States (en)
 Germany (de)
 Austria (at)
 France (fr)



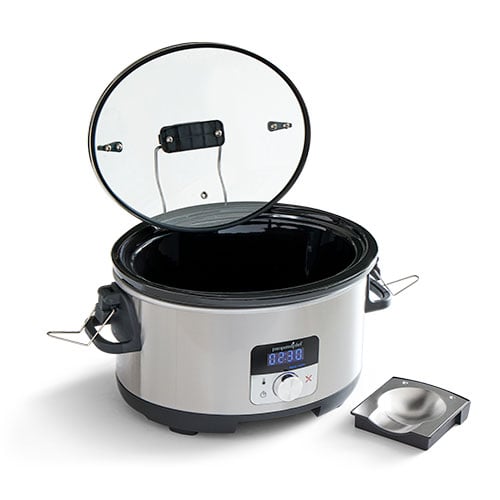

Deluxe Home & Away Slow Cooker


Slow Cooking for Busy Days
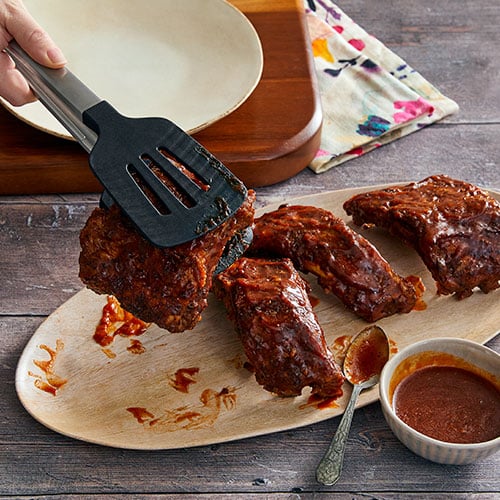
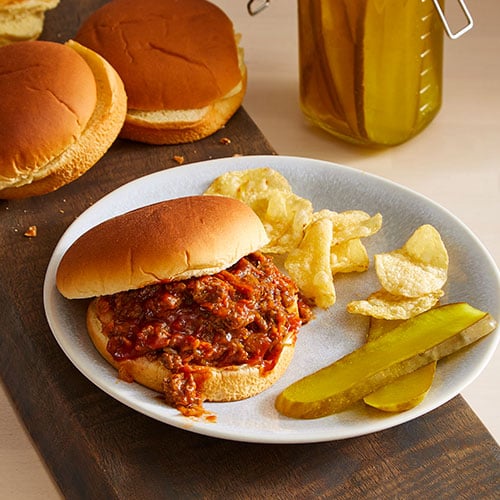
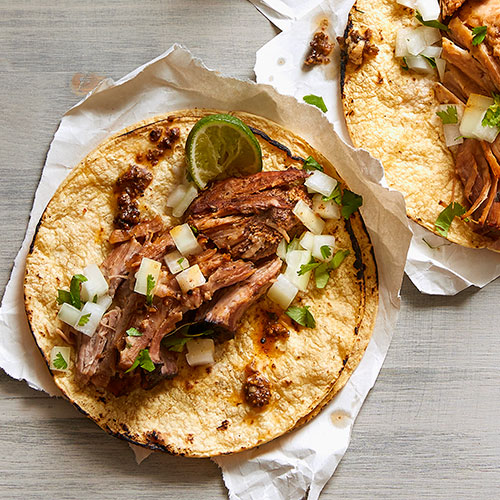
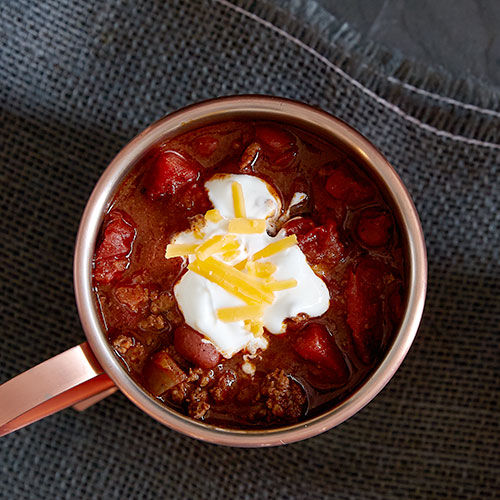
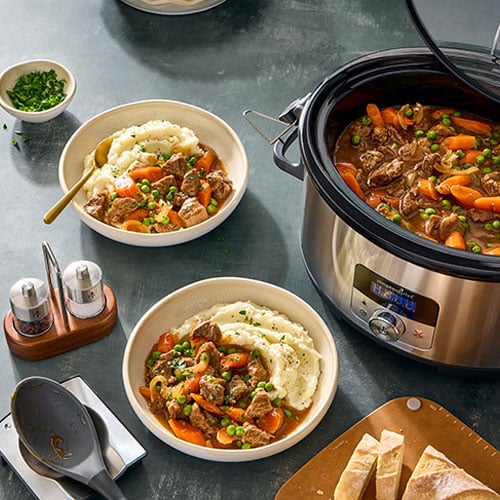
Juggling unpredictable schedules, staggered mealtimes, and nonstop commitments make it tough to get home-cooked meals on the table. Our slow cooker calms the chaos by delivering hands-off cooking that keeps dinner warm and ready. Whether it’s slow cooker chicken, beef, pork, chili, roast, soup, ribs, or stew, it brings order to hectic days and keeps you from hovering over the stove or scrambling to time dinner just right.
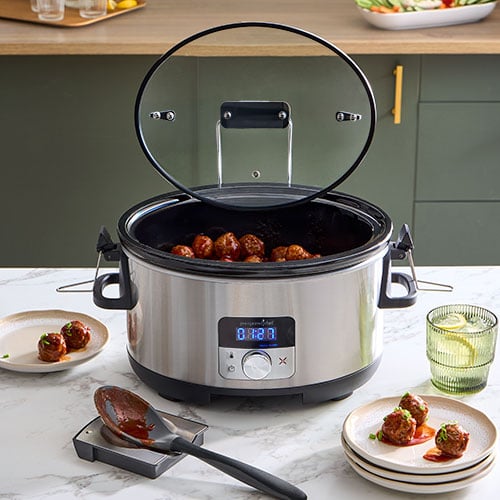
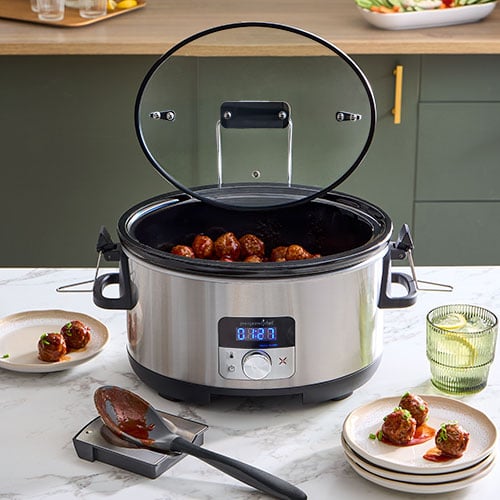
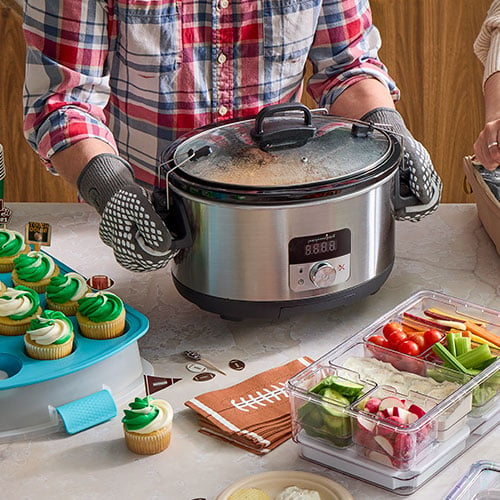
Locking latches make it stress-free to take meals to potlucks, game day, holiday events, and gatherings when on the go. Low, High, and Keep Warm settings deliver dependable results while the built-in lid rest and spoon rest keep serving clean and frustration-free. A helpful cooking guide with recipes and tips for dependable results is included.
You’ll love that it automatically switches to Keep Warm the moment cooking is done, holding your meal at the perfect serving temperature without overcooking—ready when everyone gets home and is ready to eat. It delivers the peace of mind that mealtime is handled: no rushing, just warm meals waiting to make your day less stressful and more delicious.
WHY YOU’LL LOVE IT
- The latching lid and two handles make it secure and comfortable to take on the go.
- Built-in lid and spoon rest reduces countertop clutter and mess.
- Digital display to clearly see time and settings at a glance.
- Cord storage keeps the cord neatly tucked away to store and transport.
GUARANTEE
- 2-year guarantee
Product Details
- Includes the heating base, cooking pot, spoon rest, and lid.
- Holds up to 6 qts. (5.7 L)
- Cooking pot, lid, and spoon rest are dishwasher-safe. For the heating base, wipe clean with a soft cloth.
- Not oven-, microwave-, or stovetop-safe
- 16" x 13 3/4" x 11" (40.5 cm x 35 cm x 28 cm)
- 260 watts
- 12 lbs. (5.4 k)
-
Use & Care
Use & Care
Use & Care
SAFETY AND USE INSTRUCTIONS
- Read, understand, follow, and save all Safety and Use Instructions to avoid injury.
IMPORTANT SAFEGUARDS
When using electrical appliances, basic safety precautions should always be followed, including the following:
- 1. Please read all instructions. Save these instructions.
- 2. This appliance should not be used by children. To avoid possible accidental injury, close supervision is required when the appliance is used around children or individuals whose physical, sensory, or mental abilities may prevent safe use of the appliance.
- 3. WARNING: Spilled food can cause serious burns. Keep appliance and cord away from children. Never drape cord over edge of counter, never use outlet below counter, and never use with an extension cord.
- 4. Do not lock the lid while cooking. Locking the Lid while cooking may lead to glass breakage, which can cause injuries.
- 5. Never attempt to lift or carry this appliance by the Lid handle. Always use the handles located on each side on the base of the appliance.
- 6. Only use Lid Latches when cooking has completed and the appliance has cooled.
- 7. To protect against damage or electric shock, do not cook in the Heating Base. Cook only in the provided insert. Using other cookware may result in damage to the appliance or injury to the user.
- 8. Do not touch hot surfaces. Do not touch the base, top rim, or metal exterior while the appliance is in use, as this may cause burns. Only touch push buttons and Selector Wheel while in use. Extreme caution must be used when moving an appliance containing hot oil or other hot liquids. Always use oven mitts when moving heating base and/or insert.
- 9. To protect against electrical hazards or injury, do not immerse cord, plug, or heating base in water or other liquid.
- 10. Do not pour liquid or put food directly into the Heating Base of the product. Always use with the provided Insert.
- 11. Unplug from the outlet when not in use and before cleaning. Allow to cool before putting on or taking off any parts.
- 12. The power cord should be regularly examined for signs of damage and if the cord is damaged, the appliance must not be used.
- 13. Do not let cord hang over edge of table or counter or touch heated surfaces.
- 14. For indoor use only. Do not use outdoors. Intended for countertop use only.
- 15. Do not place on or near a heat source like a hot gas or electric burner or in a heated oven.
- 16. Do not use appliance for other than intended use.
- 17. To disconnect, press the Cancel button, then remove the plug from the wall outlet. Always pull the plug out from the wall; never pull the cord.
- 18. The use of unapproved accessory attachments (such as racks) is not recommended and may cause injuries or damage. Any such use will void the warranty.
- 19. Keep the appliance 6" (15 cm) away from the wall, countertop edge, and other obstructions.
- 20. Do not let any water or other liquids enter the heating base to prevent electric shock.
- 21. Do not place any cardboard, paper, or plastic inside the appliance.
- 22. This appliance is for HOUSEHOLD USE ONLY.
- 23. This appliance is only intended for the preparation, cooking, and serving of food. It is not intended for use with any nonfood materials or products.
- 24. Some countertop and table surfaces are not designed to withstand prolonged heat. Do not set the heated appliance on non-heat safe surfaces such as finished wood, laminate, or Corian® surfaces. We recommend placing a hot pad or trivet under your Heating Base to prevent damage to the surface. Be certain not to obstruct the vents.
- 25. Always use appliance on a flat, dry, and level surface.
- 26. After cooking, to avoid burns, always use caution and oven mitts when opening the Lid as there may be steam. Always tilt the Lid away from hands and face and allow water to drip into the Insert.
- 27. It is recommended to check the unit throughout long cooking times to ensure the unit is properly working.
- 28. Avoid sudden temperature changes, such as adding refrigerated foods into a hot empty Insert.
- 29. DO NOT use or repair any insert or tempered glass Lid that is chipped, cracked, severely scratched or broken and discard.
- 30. Never use the Insert on a gas or electric cooktop, in a heated oven, under a broiler, in microwave, toaster oven, or grill, or on an open flame.
- 31. To prevent damage to the Insert and Lid, handle with care.
- 32. DO NOT place hot Insert on countertop. Use a protective trivet.
- 33. DO NOT strike utensils against rim of the Insert to dislodge food.
- 34. DO NOT use the Insert to pop popcorn kernels, caramelize sugar, or make candy.
- 35. Place the insert into the Heating Base before turning the appliance ON. NEVER heat the Insert when it is empty.
- 36. Glass Lid may shatter if it is exposed to external heat sources or subjected to severe temperature changes.
- 37. KEEP GLASS LID AWAY FROM broiler, microwave oven, hot stovetop burners, heated ovens, and oven heat vents. If glass Lid has been used in any of these locations, do not use it again, even if there are no signs of damage.
- 38. ALWAYS LET THE GLASS LID COOL on a dry, heat-resistant surface before handling. Do not place it on cold or wet surfaces, as this may cause it to crack or shatter.
- 39. When operating the appliance, remove the Spoon Rest. If left in the appliance when operating, it may become too hot to touch.
ELECTRICAL HAZARDS
Failure to abide by these specific instructions may cause electrical shock or a thermal event and could lead to death or serious injury:
- • Always unplug when not in use.
- • Do not use anything other than a 120V–60Hz power outlet.
- • Do not immerse, submerge, or sprinkle product with liquids.
- • Do not insert or remove the plug with wet hands. In order to avoid injuries due to electric shock, make sure hands are dry before plugging and unplugging the unit.
- • Do not use the appliance with wet hands.
- • Do not attempt to modify the plug in any way.
- • Regularly inspect the appliance before using. Do not use if the cord, plug, or appliance becomes damaged in any way.
- • Do not operate any appliance with a damaged cord or plug or after the appliance malfunctions or is dropped or damaged in any manner. If any of these occur, call Solution Center at (888) 687-2433 (United States) or (800) 342-2433 (Canada) for assistance.
- • If the plug fits loosely into the outlet, or if the plug or outlet feels warm, do not use that outlet.
- • Do not attempt to make any repairs to this product by yourself. See guarantee at end of this manual for more information.
- • A short power-supply cord is used to reduce the risk resulting from it being grabbed by children, becoming entangled in, or tripping over a longer cord.
- • Do not plug into a power strip or an outlet with another appliance. A grounded socket of 15A or more rated current should be used.
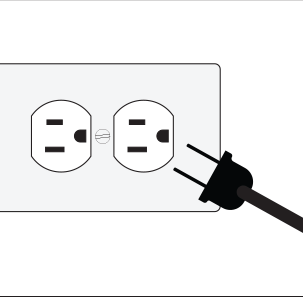
• This unit has a polarized plug (one blade is wider than the other). To reduce the risk of electric shock, this plug is intended to fit into a polarized outlet only one way. If the plug does not fit fully into the outlet, reverse the plug. If it still does not fit, contact a qualified electrician. - • Persons with various external or implanted medical devices (such as pacemakers, hearing aids, cochlear implants, etc.) should consult with authorized medical professionals before use. Refer to the instructions of medical equipment providers.
PARTS
A . Lid
B . Lid Hooks (2)
C . Lid Rest
D . Insert
E . Metal Hoops (2)
F . Lid Latches (2)
G . Heating Base
H . Display
I . Spoon Rest
J . Cord Storage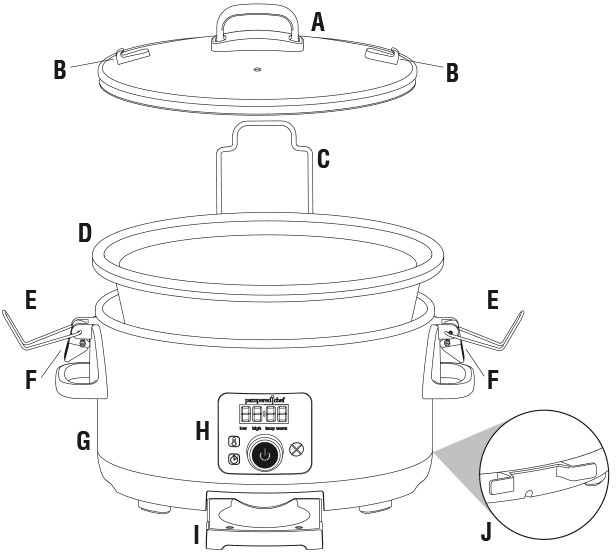
CLEANING
CAUTION: Never immerse the Heating Base in water or other liquid.
- • Unplug the appliance and let it cool completely before cleaning. Never pour liquid into the Heating Base.
- • Insert, Lid, and Spoon Rest are dishwasher-safe.
- • The outside of the Heating Base can be cleaned with a soft cloth. Dampen it with warm, soapy water, then wipe dry.
- • Do not use abrasive cleansers like steel wool, cleansers with bleach, or oven-cleaning solutions as they may permanently damage the surface and void the guarantee.
IMPORTANT BEFORE USE
Before first use:
- 1. Remove all packaging.
- 2. Read this entire document.
- 3. Clean before using.
- 4. Perform Initial Test Run!
Before each use:
- • Inspect the appliance for any damage. Do not operate if damaged. Call the Solution Center at (888) 687-2433 (United States) or (800) 342-2433 (Canada) for assistance.
- • Ensure there are no foreign objects in the appliance.
- • Place on a stable, dry, level surface, away from combustible material, external heat sources, and water or water reservoirs.
- • Position the appliance 6" (15 cm) away from any overhangs, walls, and table or countertop edges.
INITIAL TEST RUN
Before using for the first time, we recommend running a test run to familiarize yourself with the product and ensure it is working correctly.
- 1. Unwrap the cord from the cord storage at the back of the appliance.
- 2. Place the Insert into the Heating Base.
- 3. Fill the Insert 2/3 full with water and place the Lid on . DO NOT LATCH THE LID.
- 4. Slide the Spoon Rest out of the bottom of the appliance and set aside.
- 5. Plug in the appliance. 8:00 will be flashing and “low” will be lit.
- 6. Turn the Selector Wheel until you see “keep warm” lit. The screen will show 4:00 flashing. Turn the Selector Wheel counterclockwise to set the time to 30 minutes. Press again to start.
- 7. When the setting is complete, five beeps will sound. The appliance will continue to beep two times every 2 minutes for 16 minutes or until the Selector Wheel is pressed.
LED DISPLAY
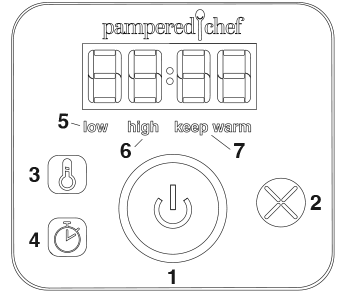
- 1. Selector Wheel: Use this to navigate through the screen to select the desired setting. Push and hold to turn off the display.
- 2. Cancel Button: Using this button, you can cancel any operation at any time that the appliance is in use, and you will be brought to four flashing lines.
- 3. Temperature Button: Press during cooking to shift to temperature setting. Use selector wheel to navigate to desired setting.
- 4. Time Button: Press during cooking to adjust the cook time. Display time will flash. Turn the Selector Wheel to desired cook time and press to select.
- 5. Low Setting: Rotate the Selector Wheel and press to select this setting. The time will flash. Rotate the Selector Wheel to desired time and press to start cooking.
- 6. High Setting: Rotate the Selector Wheel and press to select this setting. The time will flash. Rotate the Selector Wheel to desired time and press to start.
- 7. Keep Warm Setting: Rotate the Selector Wheel and press to select this setting. The time will flash. Rotate the Selector Wheel to desired time and press to start.
- • ONLY use for keeping cooked food at serving temperature until you are ready to eat. DO NOT cook or reheat on the Keep Warm setting.
- • NOTE: Food can dry out or burn when left on the Keep Warm setting for too long. Check food occasionally when you’re using the Keep Warm setting.
- • NOTE: We DO NOT recommend using the Keep Warm setting for more than 4 hours.
USE & CARE
- • Use only with the supplied Insert.
- • NOTE: During first few uses of this appliance, you may notice slight smoking and/or an odor. This is normal with many heating appliances and will not happen after a few uses.
- • WARNING: The sides and top rim of the Insert and Heating Base get very warm due to the heating elements.
- Always use oven mitts when moving the Insert or Heating Base.
- • To transport food, ensure the Lid Latches are fully secure and in place. See “To Lock Lid .”
- • When operating the appliance, remove the Spoon Rest. If left in the appliance when operating, it may become too hot to touch.
TO USE
- • Before you use your slow cooker, remove all the packaging . Place a clean and dry Insert into the stand. Add food to the Insert as the recipe directs.
- • Plug in the Heating Base, scroll to the desired setting, and press the Selector Wheel. The time will flash. Turn the Selector Wheel to desired time and press to start cooking. Refer to your specific recipe for more precise cook times.
- • LOW: Recommended for slow, all-day cooking.
- • HIGH: One hour on HIGH is equivalent to approximately 1½–2 hours on LOW.
- • KEEP WARM: ONLY for keeping cooked food at serving temperature until you are ready to eat.
- • DO NOT cook on the Keep Warm setting.
- • NOTE: Food can dry out or burn when left on the Keep Warm setting for too long. Check food occasionally when you’re using the Keep Warm setting.
- • When you’re done cooking, unplug the Heating Base and let it cool before cleaning.
To Lock the Lid
- • Place the Lid on the Insert.
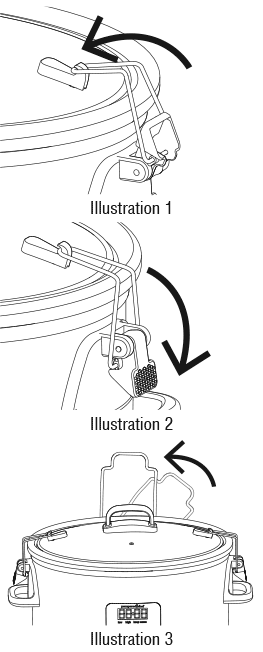
- • Lift the Lid Latches . Place the Metal Hoops over the Lid Hooks until they catch. See illustration 1.
- • Press the Lid Latches down until they are snapped into place. See illustration 2.
- • To unlock the Lid, lift the Lid Latches on both sides and unhook the Metal Hoops from the Lid Hooks.
To Use Lid Rest
- • Grip the Lid Rest attached to the Heating Base and rotate up until it clicks into place. See illustration 3.
- • Slide the Lid handle over the Lid Rest until seated.
- • WARNING: Always use oven mitts when handling a hot Lid.
Important Usage Tips
- • Make sure the inside bottom of the Insert is completely covered with food or liquid and there are no dry spots.
- • Don’t overfill the Insert. To prevent boil-overs and spills, leave enough space between the top of the Insert and the food so that the recipe has room to simmer and without touching the Lid.
- • Stirring is not usually necessary when slow cooking. Removing the Lid releases lots of heat, so the cook time may need to be extended. However, if you’re cooking on HIGH, you may want to stir occasionally. To make sure your recipe gets up to the right temperature, don’t remove the Lid during the first two hours of cooking.
- WARNING: Always use an oven mitt when touching a hot Insert, Lid, or Heating Base. Be careful when opening the Lid as there may be steam.
- • Many recipes call for all-day cooking. If you don’t have time to prepare in the morning, you can do it the night before. Place all ingredients in the Insert, cover it with the Lid, and refrigerate it overnight. In the morning, just place the insert in the Heating Base. You may need to extend the cook time to account for refrigerating the Insert.
- • Slow cookers allow for very little evaporation, so it’s normal to have more liquid at the end of cooking.
Food Safety Tips
- • For most recipes, seafood, milk, cream, or sour cream should be added toward the end of cooking. Exceptions may apply in Pampered Chef recipes: Always follow the specific recipe directions.
- • If you suspect that the power has gone out during the day, the food may be unsafe to eat. If you’re not sure how long the power was out, discard the food inside.
- • Do not use frozen, uncooked meat in the slow cooker. Thaw any meat or poultry before slow cooking.
- • Never let undercooked or raw meat sit at room temperature in the slow cooker. Once meat is placed into the Insert, it should be cooked immediately (unless you’re prepping and refrigerating food the night before).
TROUBLESHOOTING
PROBLEM SOLUTIONS Food is undercooked. - • The food was cooked on Keep Warm setting. Do not cook on Keep Warm. Only cook on the LOW or HIGH settings.
- • The power may have been interrupted.
- • The food was cooked on the LOW setting, but the recipe’s cook time was based on the HIGH setting.
- • The Insert was overfilled.
- • The Lid was not placed on the Insert correctly. Make sure the Lid is positioned securely.
Food is overcooked. - • The food was cooked on the HIGH setting, but the recipe’s cook time was based on the LOW setting.
- • Try to check food 1–2 hours earlier than the recipe states to see if it’s done.
The food isn’t done after cooking the amount of time recommended in my recipe. - • This can be due to voltage variations (which are common) or altitude. Slight fluctuations in power don’t have a noticeable effect on most appliances; however, it can extend cook times in the slow cooker. You’ll learn through experience if a shorter or longer time is needed.
GUARANTEE
- • Two-year guarantee for noncommercial use.
Made in China
Guarantee
Use & Care
SAFETY AND USE INSTRUCTIONS
- Read, understand, follow, and save all Safety and Use Instructions to avoid injury.
IMPORTANT SAFEGUARDS
When using electrical appliances, basic safety precautions should always be followed, including the following:
- 1. Please read all instructions. Save these instructions.
- 2. This appliance should not be used by children. To avoid possible accidental injury, close supervision is required when the appliance is used around children or individuals whose physical, sensory, or mental abilities may prevent safe use of the appliance.
- 3. WARNING: Spilled food can cause serious burns. Keep appliance and cord away from children. Never drape cord over edge of counter, never use outlet below counter, and never use with an extension cord.
- 4. Do not lock the lid while cooking. Locking the Lid while cooking may lead to glass breakage, which can cause injuries.
- 5. Never attempt to lift or carry this appliance by the Lid handle. Always use the handles located on each side on the base of the appliance.
- 6. Only use Lid Latches when cooking has completed and the appliance has cooled.
- 7. To protect against damage or electric shock, do not cook in the Heating Base. Cook only in the provided insert. Using other cookware may result in damage to the appliance or injury to the user.
- 8. Do not touch hot surfaces. Do not touch the base, top rim, or metal exterior while the appliance is in use, as this may cause burns. Only touch push buttons and Selector Wheel while in use. Extreme caution must be used when moving an appliance containing hot oil or other hot liquids. Always use oven mitts when moving heating base and/or insert.
- 9. To protect against electrical hazards or injury, do not immerse cord, plug, or heating base in water or other liquid.
- 10. Do not pour liquid or put food directly into the Heating Base of the product. Always use with the provided Insert.
- 11. Unplug from the outlet when not in use and before cleaning. Allow to cool before putting on or taking off any parts.
- 12. The power cord should be regularly examined for signs of damage and if the cord is damaged, the appliance must not be used.
- 13. Do not let cord hang over edge of table or counter or touch heated surfaces.
- 14. For indoor use only. Do not use outdoors. Intended for countertop use only.
- 15. Do not place on or near a heat source like a hot gas or electric burner or in a heated oven.
- 16. Do not use appliance for other than intended use.
- 17. To disconnect, press the Cancel button, then remove the plug from the wall outlet. Always pull the plug out from the wall; never pull the cord.
- 18. The use of unapproved accessory attachments (such as racks) is not recommended and may cause injuries or damage. Any such use will void the warranty.
- 19. Keep the appliance 6" (15 cm) away from the wall, countertop edge, and other obstructions.
- 20. Do not let any water or other liquids enter the heating base to prevent electric shock.
- 21. Do not place any cardboard, paper, or plastic inside the appliance.
- 22. This appliance is for HOUSEHOLD USE ONLY.
- 23. This appliance is only intended for the preparation, cooking, and serving of food. It is not intended for use with any nonfood materials or products.
- 24. Some countertop and table surfaces are not designed to withstand prolonged heat. Do not set the heated appliance on non-heat safe surfaces such as finished wood, laminate, or Corian® surfaces. We recommend placing a hot pad or trivet under your Heating Base to prevent damage to the surface. Be certain not to obstruct the vents.
- 25. Always use appliance on a flat, dry, and level surface.
- 26. After cooking, to avoid burns, always use caution and oven mitts when opening the Lid as there may be steam. Always tilt the Lid away from hands and face and allow water to drip into the Insert.
- 27. It is recommended to check the unit throughout long cooking times to ensure the unit is properly working.
- 28. Avoid sudden temperature changes, such as adding refrigerated foods into a hot empty Insert.
- 29. DO NOT use or repair any insert or tempered glass Lid that is chipped, cracked, severely scratched or broken and discard.
- 30. Never use the Insert on a gas or electric cooktop, in a heated oven, under a broiler, in microwave, toaster oven, or grill, or on an open flame.
- 31. To prevent damage to the Insert and Lid, handle with care.
- 32. DO NOT place hot Insert on countertop. Use a protective trivet.
- 33. DO NOT strike utensils against rim of the Insert to dislodge food.
- 34. DO NOT use the Insert to pop popcorn kernels, caramelize sugar, or make candy.
- 35. Place the insert into the Heating Base before turning the appliance ON. NEVER heat the Insert when it is empty.
- 36. Glass Lid may shatter if it is exposed to external heat sources or subjected to severe temperature changes.
- 37. KEEP GLASS LID AWAY FROM broiler, microwave oven, hot stovetop burners, heated ovens, and oven heat vents. If glass Lid has been used in any of these locations, do not use it again, even if there are no signs of damage.
- 38. ALWAYS LET THE GLASS LID COOL on a dry, heat-resistant surface before handling. Do not place it on cold or wet surfaces, as this may cause it to crack or shatter.
- 39. When operating the appliance, remove the Spoon Rest. If left in the appliance when operating, it may become too hot to touch.
ELECTRICAL HAZARDS
Failure to abide by these specific instructions may cause electrical shock or a thermal event and could lead to death or serious injury:
- • Always unplug when not in use.
- • Do not use anything other than a 120V–60Hz power outlet.
- • Do not immerse, submerge, or sprinkle product with liquids.
- • Do not insert or remove the plug with wet hands. In order to avoid injuries due to electric shock, make sure hands are dry before plugging and unplugging the unit.
- • Do not use the appliance with wet hands.
- • Do not attempt to modify the plug in any way.
- • Regularly inspect the appliance before using. Do not use if the cord, plug, or appliance becomes damaged in any way.
- • Do not operate any appliance with a damaged cord or plug or after the appliance malfunctions or is dropped or damaged in any manner. If any of these occur, call Solution Center at (888) 687-2433 (United States) or (800) 342-2433 (Canada) for assistance.
- • If the plug fits loosely into the outlet, or if the plug or outlet feels warm, do not use that outlet.
- • Do not attempt to make any repairs to this product by yourself. See guarantee at end of this manual for more information.
- • A short power-supply cord is used to reduce the risk resulting from it being grabbed by children, becoming entangled in, or tripping over a longer cord.
- • Do not plug into a power strip or an outlet with another appliance. A grounded socket of 15A or more rated current should be used.
• This unit has a polarized plug (one blade is wider than the other). To reduce the risk of electric shock, this plug is intended to fit into a polarized outlet only one way. If the plug does not fit fully into the outlet, reverse the plug. If it still does not fit, contact a qualified electrician. - • Persons with various external or implanted medical devices (such as pacemakers, hearing aids, cochlear implants, etc.) should consult with authorized medical professionals before use. Refer to the instructions of medical equipment providers.
PARTS
A . Lid
B . Lid Hooks (2)
C . Lid Rest
D . Insert
E . Metal Hoops (2)
F . Lid Latches (2)
G . Heating Base
H . Display
I . Spoon Rest
J . Cord StorageCLEANING
CAUTION: Never immerse the Heating Base in water or other liquid.
- • Unplug the appliance and let it cool completely before cleaning. Never pour liquid into the Heating Base.
- • Insert, Lid, and Spoon Rest are dishwasher-safe.
- • The outside of the Heating Base can be cleaned with a soft cloth. Dampen it with warm, soapy water, then wipe dry.
- • Do not use abrasive cleansers like steel wool, cleansers with bleach, or oven-cleaning solutions as they may permanently damage the surface and void the guarantee.
IMPORTANT BEFORE USE
Before first use:
- 1. Remove all packaging.
- 2. Read this entire document.
- 3. Clean before using.
- 4. Perform Initial Test Run!
Before each use:
- • Inspect the appliance for any damage. Do not operate if damaged. Call the Solution Center at (888) 687-2433 (United States) or (800) 342-2433 (Canada) for assistance.
- • Ensure there are no foreign objects in the appliance.
- • Place on a stable, dry, level surface, away from combustible material, external heat sources, and water or water reservoirs.
- • Position the appliance 6" (15 cm) away from any overhangs, walls, and table or countertop edges.
INITIAL TEST RUN
Before using for the first time, we recommend running a test run to familiarize yourself with the product and ensure it is working correctly.
- 1. Unwrap the cord from the cord storage at the back of the appliance.
- 2. Place the Insert into the Heating Base.
- 3. Fill the Insert 2/3 full with water and place the Lid on . DO NOT LATCH THE LID.
- 4. Slide the Spoon Rest out of the bottom of the appliance and set aside.
- 5. Plug in the appliance. 8:00 will be flashing and “low” will be lit.
- 6. Turn the Selector Wheel until you see “keep warm” lit. The screen will show 4:00 flashing. Turn the Selector Wheel counterclockwise to set the time to 30 minutes. Press again to start.
- 7. When the setting is complete, five beeps will sound. The appliance will continue to beep two times every 2 minutes for 16 minutes or until the Selector Wheel is pressed.
LED DISPLAY
- 1. Selector Wheel: Use this to navigate through the screen to select the desired setting. Push and hold to turn off the display.
- 2. Cancel Button: Using this button, you can cancel any operation at any time that the appliance is in use, and you will be brought to four flashing lines.
- 3. Temperature Button: Press during cooking to shift to temperature setting. Use selector wheel to navigate to desired setting.
- 4. Time Button: Press during cooking to adjust the cook time. Display time will flash. Turn the Selector Wheel to desired cook time and press to select.
- 5. Low Setting: Rotate the Selector Wheel and press to select this setting. The time will flash. Rotate the Selector Wheel to desired time and press to start cooking.
- 6. High Setting: Rotate the Selector Wheel and press to select this setting. The time will flash. Rotate the Selector Wheel to desired time and press to start.
- 7. Keep Warm Setting: Rotate the Selector Wheel and press to select this setting. The time will flash. Rotate the Selector Wheel to desired time and press to start.
- • ONLY use for keeping cooked food at serving temperature until you are ready to eat. DO NOT cook or reheat on the Keep Warm setting.
- • NOTE: Food can dry out or burn when left on the Keep Warm setting for too long. Check food occasionally when you’re using the Keep Warm setting.
- • NOTE: We DO NOT recommend using the Keep Warm setting for more than 4 hours.
USE & CARE
- • Use only with the supplied Insert.
- • NOTE: During first few uses of this appliance, you may notice slight smoking and/or an odor. This is normal with many heating appliances and will not happen after a few uses.
- • WARNING: The sides and top rim of the Insert and Heating Base get very warm due to the heating elements.
- Always use oven mitts when moving the Insert or Heating Base.
- • To transport food, ensure the Lid Latches are fully secure and in place. See “To Lock Lid .”
- • When operating the appliance, remove the Spoon Rest. If left in the appliance when operating, it may become too hot to touch.
TO USE
- • Before you use your slow cooker, remove all the packaging . Place a clean and dry Insert into the stand. Add food to the Insert as the recipe directs.
- • Plug in the Heating Base, scroll to the desired setting, and press the Selector Wheel. The time will flash. Turn the Selector Wheel to desired time and press to start cooking. Refer to your specific recipe for more precise cook times.
- • LOW: Recommended for slow, all-day cooking.
- • HIGH: One hour on HIGH is equivalent to approximately 1½–2 hours on LOW.
- • KEEP WARM: ONLY for keeping cooked food at serving temperature until you are ready to eat.
- • DO NOT cook on the Keep Warm setting.
- • NOTE: Food can dry out or burn when left on the Keep Warm setting for too long. Check food occasionally when you’re using the Keep Warm setting.
- • When you’re done cooking, unplug the Heating Base and let it cool before cleaning.
To Lock the Lid
- • Place the Lid on the Insert.
- • Lift the Lid Latches . Place the Metal Hoops over the Lid Hooks until they catch. See illustration 1.
- • Press the Lid Latches down until they are snapped into place. See illustration 2.
- • To unlock the Lid, lift the Lid Latches on both sides and unhook the Metal Hoops from the Lid Hooks.
To Use Lid Rest
- • Grip the Lid Rest attached to the Heating Base and rotate up until it clicks into place. See illustration 3.
- • Slide the Lid handle over the Lid Rest until seated.
- • WARNING: Always use oven mitts when handling a hot Lid.
Important Usage Tips
- • Make sure the inside bottom of the Insert is completely covered with food or liquid and there are no dry spots.
- • Don’t overfill the Insert. To prevent boil-overs and spills, leave enough space between the top of the Insert and the food so that the recipe has room to simmer and without touching the Lid.
- • Stirring is not usually necessary when slow cooking. Removing the Lid releases lots of heat, so the cook time may need to be extended. However, if you’re cooking on HIGH, you may want to stir occasionally. To make sure your recipe gets up to the right temperature, don’t remove the Lid during the first two hours of cooking.
- WARNING: Always use an oven mitt when touching a hot Insert, Lid, or Heating Base. Be careful when opening the Lid as there may be steam.
- • Many recipes call for all-day cooking. If you don’t have time to prepare in the morning, you can do it the night before. Place all ingredients in the Insert, cover it with the Lid, and refrigerate it overnight. In the morning, just place the insert in the Heating Base. You may need to extend the cook time to account for refrigerating the Insert.
- • Slow cookers allow for very little evaporation, so it’s normal to have more liquid at the end of cooking.
Food Safety Tips
- • For most recipes, seafood, milk, cream, or sour cream should be added toward the end of cooking. Exceptions may apply in Pampered Chef recipes: Always follow the specific recipe directions.
- • If you suspect that the power has gone out during the day, the food may be unsafe to eat. If you’re not sure how long the power was out, discard the food inside.
- • Do not use frozen, uncooked meat in the slow cooker. Thaw any meat or poultry before slow cooking.
- • Never let undercooked or raw meat sit at room temperature in the slow cooker. Once meat is placed into the Insert, it should be cooked immediately (unless you’re prepping and refrigerating food the night before).
TROUBLESHOOTING
PROBLEM SOLUTIONS Food is undercooked. - • The food was cooked on Keep Warm setting. Do not cook on Keep Warm. Only cook on the LOW or HIGH settings.
- • The power may have been interrupted.
- • The food was cooked on the LOW setting, but the recipe’s cook time was based on the HIGH setting.
- • The Insert was overfilled.
- • The Lid was not placed on the Insert correctly. Make sure the Lid is positioned securely.
Food is overcooked. - • The food was cooked on the HIGH setting, but the recipe’s cook time was based on the LOW setting.
- • Try to check food 1–2 hours earlier than the recipe states to see if it’s done.
The food isn’t done after cooking the amount of time recommended in my recipe. - • This can be due to voltage variations (which are common) or altitude. Slight fluctuations in power don’t have a noticeable effect on most appliances; however, it can extend cook times in the slow cooker. You’ll learn through experience if a shorter or longer time is needed.
GUARANTEE
- • Two-year guarantee for noncommercial use.
Made in China
Guarantee